Every guide to this recommends Flexible mode. It’s the top option, it works immediately, and you get a padlock in the browser within minutes.
It’s also the wrong answer, and it’s the direct cause of the redirect loop those same guides then spend a section explaining how to fix. Flexible means the connection between Cloudflare and your server is plain, unencrypted HTTP. Your visitors see a padlock that describes only half the journey.
There’s a second thing those guides can’t cover, because it arrived after most of them were written. Cloudflare now scans your origin about once a month and changes your encryption mode by itself. Sites that ran fine for years have broken overnight because of it, and the owners hadn’t touched a setting.
Here’s how to set this up so it’s actually secure, and so an automatic upgrade doesn’t take your site down.
Understanding the Two Halves
Once Cloudflare proxies your site, a request travels in two hops.
The first is browser to Cloudflare. Cloudflare handles that certificate for you, it’s free, and it’s always encrypted. This is the hop that produces the padlock.
The second is Cloudflare to your server. This is the one you choose, and it’s the one every tutorial glosses over.
| Mode | Second hop | Origin cert checked |
|---|---|---|
| Off | Not encrypted | No |
| Flexible | Not encrypted | No |
| Full | Encrypted | No |
| Full (strict) | Encrypted | Yes |
The padlock looks identical to your visitors in every row of that table. That’s the whole problem with Flexible: it produces the visible symbol of security without the thing the symbol is supposed to represent.
Anyone positioned between Cloudflare and your host reads that traffic in the clear. That includes WordPress login credentials. Cloudflare’s own documentation calls Flexible a mode for origins that can’t support TLS, and recommends upgrading the origin whenever possible.
Full (strict) is the target. Everything below is about getting there without breaking anything.
Checking What Cloudflare Is Already Doing
Before changing anything, find out whether Cloudflare is managing this for you.
Go to SSL/TLS » Overview. You’ll see either an Automatic SSL/TLS option or a plain Custom SSL/TLS list, depending on whether your zone has been migrated.
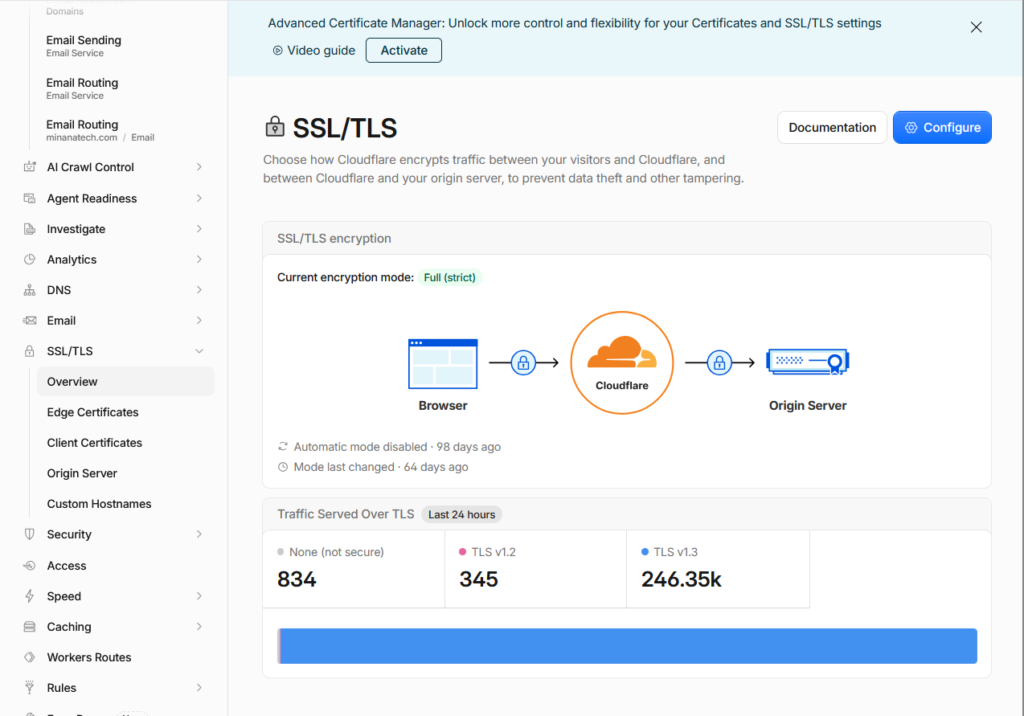
Automatic SSL/TLS is Cloudflare’s feature from August 2024. It probes your origin roughly monthly, works out the most secure mode your setup can handle, and moves you up to it. The rollout is gradual, starting at one percent of traffic and climbing in increments, and it rolls back if the origin starts failing.
It’s a good feature and I’d leave it on. But you need to know it exists, because it explains something people find baffling: a site that has worked for two years suddenly throwing certificate errors with no changes made. What changed was Cloudflare deciding your origin could do better, and discovering mid-upgrade that it couldn’t.
Cloudflare sends a weekly digest email listing zones it has upgraded. Worth not filtering into a folder you never open.
Getting a Certificate on Your Server
Full (strict) requires a valid certificate on your own server, so this comes first. Check with your host before assuming you don’t have one, because most shared hosting now includes free Let’s Encrypt certificates in the control panel.
If you already have one and it’s current, skip to the next section.
If you don’t, Cloudflare gives you one free. Go to SSL/TLS » Origin Server » Create Certificate.
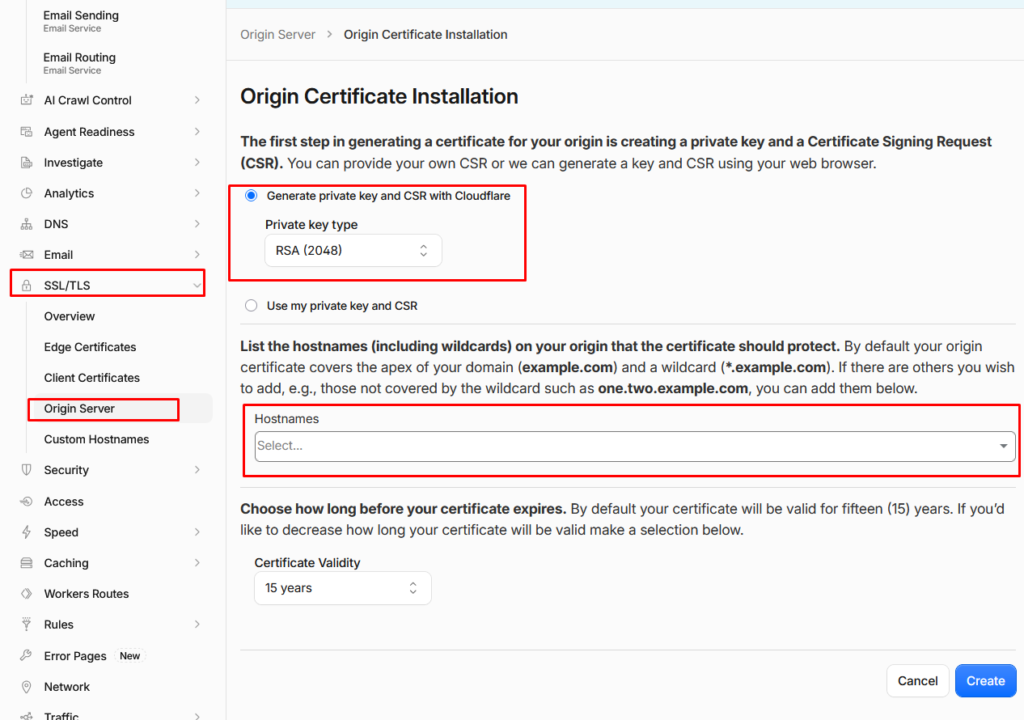
Accept the defaults, choose a validity of 15 years, and generate. You get a certificate and a private key. Copy both immediately, because the private key is shown once and never again.
Install them through your host’s control panel, usually under a section called SSL or Certificates. If you’re on cPanel it’s under SSL/TLS, in the option to install a certificate on a domain.
An Origin CA certificate is trusted by Cloudflare and by nothing else. A browser visiting your server directly would reject it. That’s fine and intended, because with Cloudflare proxying, no browser ever talks to your server directly. It also means the certificate is useless if you ever grey-cloud that record.
One trap worth knowing if you use Let’s Encrypt at the origin instead. The usual HTTP validation method fails while a hostname is proxied through Cloudflare, because the validation request never reaches your server. Either switch that certificate to DNS validation, or use the Origin CA certificate above and stop thinking about renewals for 15 years.
Setting the Mode
Back to SSL/TLS » Overview. If you’re on Custom SSL/TLS, pick the mode there. If you’re on Automatic, switch to Custom temporarily so you’re in control while you test.
Go to Full first, not straight to Full (strict).
That sounds like a wasted step and it isn’t. Full encrypts the second hop without checking the certificate. If the site stays up on Full, you know the origin is speaking HTTPS properly. If it breaks, the problem is the connection itself rather than the certificate, which is a much easier thing to debug in isolation.
Load a few pages. Give it five minutes. Then move to Full (strict).
If Full (strict) breaks and Full didn’t, your certificate is the issue: expired, self-signed, or issued for a different hostname. Fix that rather than dropping back down and leaving it.
This is also worth understanding as a long-term risk. On Full, Cloudflare never checks your certificate, so an expired one causes no visible symptom. A renewal that silently stopped working two years ago looks exactly like a healthy site. People discover it the day something forces validation, which increasingly means the day Automatic SSL/TLS decides to upgrade them.
Once Full (strict) is stable, you can switch back to Automatic SSL/TLS. There’s nothing left for it to upgrade you to, so the scans simply stop.
Fixing the URLs in WordPress
The encryption is now correct. WordPress still doesn’t know.
Go to Settings » General and check the two address fields. If either still starts with http, that’s what needs changing.
Modern WordPress often handles this for you. Open Tools » Site Health and look at the HTTPS status. When WordPress detects that your site supports HTTPS but the settings say otherwise, it offers a button to update both URLs at once.
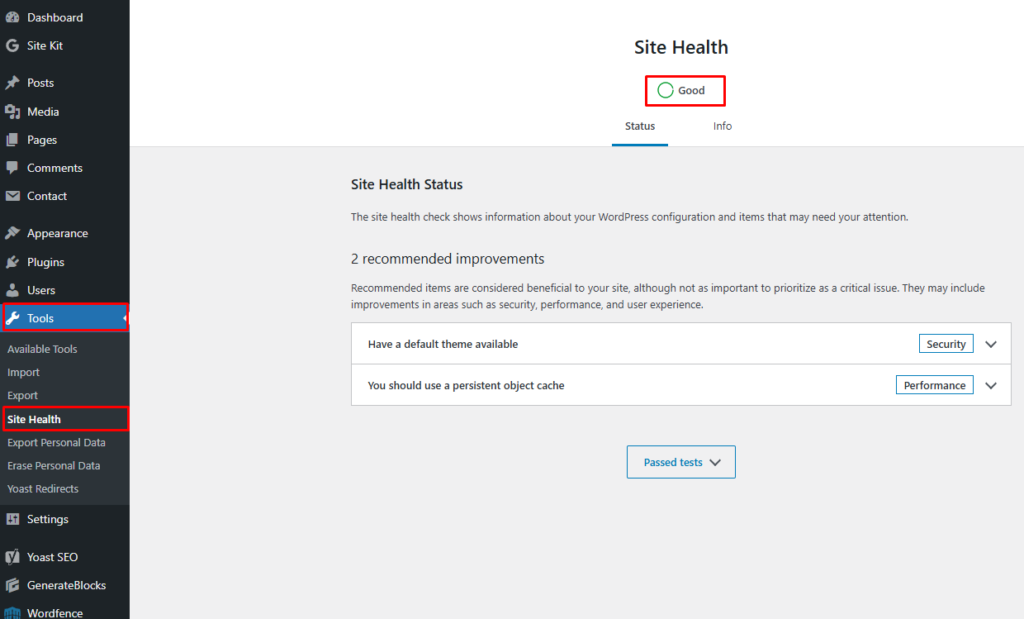
Use that button if it’s there. It’s been in core since WordPress 5.7 and it does the job that people used to install a plugin for. Back up your database first, because changing site URLs is one of the few settings that can lock you out of your own dashboard.
Old links inside your posts are a separate job. Every image and internal link you wrote before the switch still points at http, and those cause mixed content warnings. A search and replace across the database handles it, or the Better Search Replace plugin if you’d rather not touch SQL. Either way, back up first. There’s more on doing that without paying for anything in backing up WordPress for free.
Forcing HTTPS at the Edge
Two toggles in SSL/TLS » Edge Certificates, and the order matters.
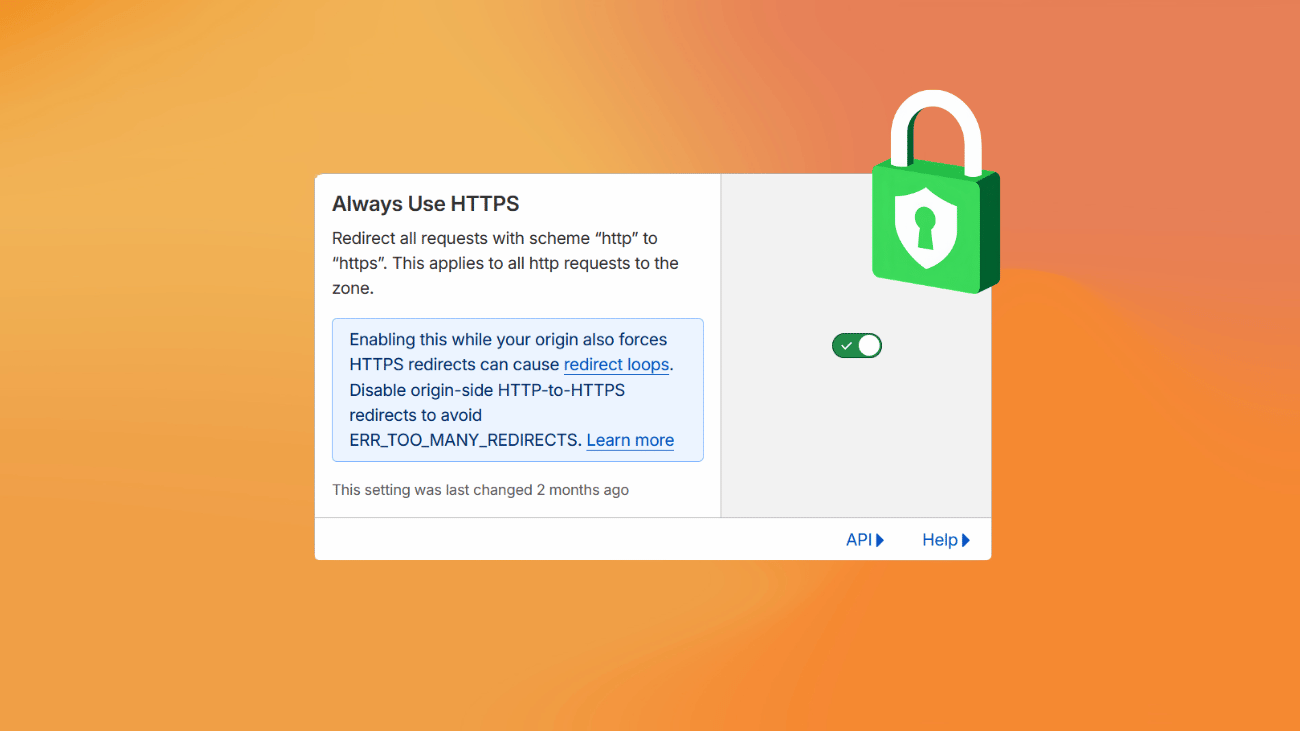
Always Use HTTPS. Redirects every http request to https at Cloudflare’s edge, before it ever reaches your server. Turn this on rather than using a WordPress plugin to do the same thing, because the redirect happens earlier and costs you nothing.
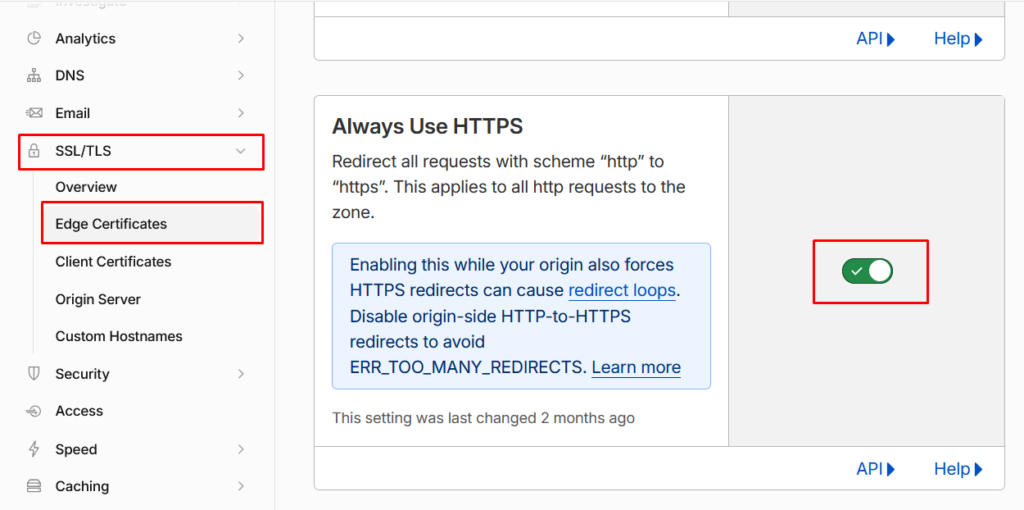
Automatic HTTPS Rewrites. Rewrites http resource links in your pages to https on the way out. This patches mixed content without you finding every old URL. Treat it as a safety net rather than a fix, because the wrong URLs are still sitting in your database.
Turn these on only after the mode is set and the site works. Enable Always Use HTTPS while you’re still on Flexible and you get the redirect loop described in the next section, immediately.
The Redirect Loop, and Why It Happens
ERR_TOO_MANY_REDIRECTS. Every guide on this topic has a section about it, and almost none explain the cause, which is a shame because the cause explains the fix.
Here’s the sequence on Flexible mode:
- A visitor requests your site over https. Cloudflare accepts it.
- Cloudflare forwards the request to your server over plain http, because that’s what Flexible does.
- WordPress sees an http request, checks its settings, sees it should be https, and issues a redirect to https.
- That redirect goes back through Cloudflare, which forwards it to your server over http again.
- Repeat until the browser gives up.
Nothing is misconfigured in WordPress. WordPress is doing exactly what it should. The loop exists because Flexible mode lies to it about what protocol the visitor used.
The fix is to stop using Flexible. On Full or Full (strict), Cloudflare forwards over https, WordPress sees https, and there’s nothing to redirect.
The workaround you’ll find everywhere is a snippet for wp-config.php that tells WordPress to trust a header Cloudflare sends:
if (isset($_SERVER['HTTP_X_FORWARDED_PROTO'])
    && $_SERVER['HTTP_X_FORWARDED_PROTO'] === 'https') {
    $_SERVER['HTTPS'] = 'on';
}
Put it above the line that says to stop editing. It does work, and it’s genuinely useful on Full mode where some setups still get confused.
But be clear about what it does on Flexible: it stops the loop and leaves your origin traffic unencrypted. The visible symptom goes away, the actual problem doesn’t. Most tutorials present this snippet as the solution. It’s a workaround for a configuration you shouldn’t be running.
Leave HSTS Alone For Now
Further down the Edge Certificates page is HSTS, which tells browsers to refuse http connections to your domain entirely for a period you set.
It’s a real security improvement and I’d get there eventually. Not today.
HSTS is stored by the visitor’s browser, not by you. Turn it on with a six-month duration and every browser that has visited will refuse to load your site over http for six months, whatever you do at your end. If your certificate then breaks, you can’t fall back to http while you fix it. Visitors get a security warning they cannot click past.
Run on Full (strict) for a few weeks first. When you’re confident nothing is going to surprise you, come back and start with a short duration.
Checking It Actually Worked
The padlock is not the test. The padlock appears on Flexible too.
Confirm the mode. SSL/TLS Overview should read Full (strict). That’s the only check that tells you the second hop is both encrypted and verified.
Type http deliberately. Enter your address with http:// in a private window and confirm it redirects. If it loads over http without redirecting, Always Use HTTPS isn’t on.
Open the browser console. Press F12, reload, and look for mixed content warnings. They tell you exactly which URLs still point at http.
Test the admin area separately. Log out and log back in. Loops and cookie problems often show up in wp-admin while the public site looks perfect.
Check Site Health. Tools » Site Health will flag remaining HTTPS problems, and it’s the fastest way to catch something you’ve missed.
When It Breaks
Error 526. Cloudflare couldn’t validate your origin certificate. You’re on Full (strict) with an expired, self-signed, or wrong-hostname certificate. Install a valid one or use the Origin CA certificate above.
Error 525. The TLS handshake with your origin failed. Usually the server isn’t listening on port 443 at all. Ask your host.
Redirect loop. Almost always Flexible mode plus a redirect somewhere. Change the mode first, then look at plugins or .htaccess rules if it persists.
Broke overnight with no changes. Check the Overview page for a note about when the mode last changed. Automatic SSL/TLS may have upgraded you onto a certificate that was quietly broken. The fix is to repair the certificate, not to switch the feature off.
Padlock has a warning triangle. Mixed content. Console, find the http URLs, replace them in the database.
Locked out of wp-admin. Set the site URL directly in wp-config.php to get back in:
define('WP_HOME', 'https://yoursite.com');
define('WP_SITEURL', 'https://yoursite.com');
Remove those lines once you’ve fixed the settings properly, because while they’re present the fields in Settings are locked.
The Short Version
Get a valid certificate on your own server, using Cloudflare’s free Origin CA one if your host doesn’t provide it. Move to Full, confirm the site works, then move to Full (strict). Update your WordPress URLs through Site Health. Turn on Always Use HTTPS and Automatic HTTPS Rewrites last. Leave HSTS for another week.
Whatever you do, don’t stop at Flexible because the padlock appeared. Half the connection is still in the clear, including the half carrying your login details, and the padlock your visitors trust is describing a journey it doesn’t cover.
None of which is an argument that every small blog needs Cloudflare in the first place, something we were fairly blunt about in whether you need Cloudflare. But if you’re using it, this is how to use it properly, and there’s more on the rest of the picture in securing WordPress without paid plugins.