Every guide to this trick tells you to open Email » Email Routing in your Cloudflare dashboard. Go and look for it. It’s gone. Cloudflare folded the feature into a product called Email Service, and it now lives at Compute » Email Service » Email Routing.
That’s the first thing most tutorials get wrong. The second is bigger, and nobody warns you about it until you’ve already told people your new address: what you’re about to set up can receive mail, but it cannot send it. Not one of the six guides I read before writing this mentioned that in the first half of the article, and two never mentioned it at all.
So this guide covers both halves. Receiving, which is genuinely free and takes about ten minutes. And sending, which needs a second piece and is where the “completely free” claim starts getting complicated.
What You Actually Get
Cloudflare Email Routing is a forwarder. Mail sent to you@yourdomain.com arrives at Cloudflare, and Cloudflare passes it on to a mailbox you already own, usually Gmail. That’s the whole mechanism.
What it isn’t, and this matters:
| What people expect | What you get |
|---|---|
| A mailbox at your domain | No mailbox. Nothing is stored. Mail passes through. |
| Webmail login | None. You read mail in Gmail. |
| Send and reply from your domain | Not from Cloudflare. Needs a separate setup. |
| Google Workspace for free | No. This is a forwarder, not a mail host. |
Cloudflare’s own documentation puts it plainly: Email Routing does not support sending or replying from your Cloudflare domain. Take that seriously before you print business cards.
For a blog contact address, a receipts address, or an alias you hand out and don’t want tied to your personal Gmail, that’s completely fine. For a business that needs to answer customers, it isn’t.
What You Need Before Starting
Three things, and the second one catches people out.
A domain you own. Any registrar. You don’t need hosting, and this works whether your site sits on WordPress, Blogger, or nowhere at all.
That domain on Cloudflare’s own nameservers. Not partial setup, not a CNAME arrangement. Cloudflare has to be running your DNS, because Email Routing works by writing MX records into your zone. If your registrar still holds your DNS, this won’t appear as an option.
An existing email address you check. Gmail, Outlook, anything. This is where your mail actually lands.
One warning before you touch anything. If your domain already handles email, whether that’s a hosting mailbox, Zoho, or Google Workspace, enabling Email Routing REPLACES your existing MX records. Mail to your current address stops arriving, immediately and without a warning dialog you’ll take seriously. Screenshot your DNS records first.
Turning On Email Routing
In the Cloudflare dashboard, select your domain, then go to Compute » Email Service » Email Routing.
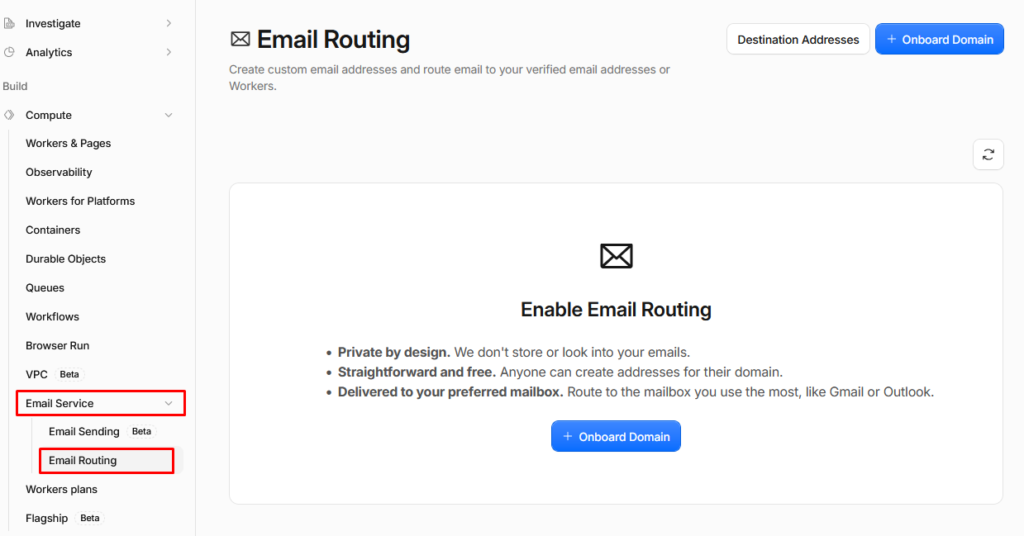
If you’ve read an older tutorial and are hunting for a standalone Email item in the sidebar, stop. It moved. Everything email-related sits under Compute now.
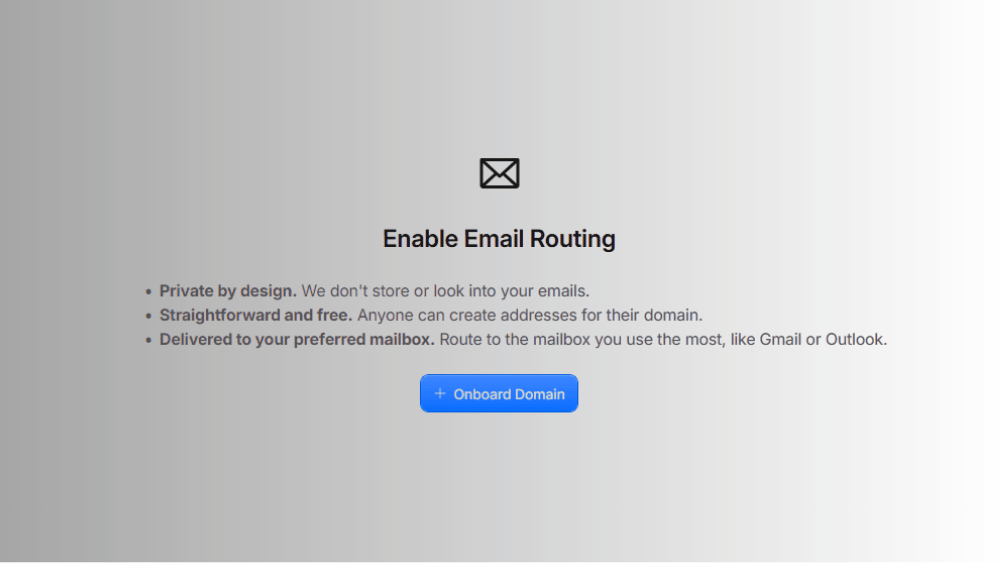
Click through the enable prompt. Cloudflare writes three MX records and a TXT record into your DNS for you, and you don’t need to copy anything by hand.
The TXT record is an SPF entry authorising Cloudflare’s servers to handle mail for your domain. If you already have an SPF record for something else, say a newsletter tool or a transactional service, do NOT let a second one sit alongside it. A domain is allowed exactly one SPF record, and having two makes both fail. Merge them into a single line instead.
Verifying Where Mail Should Land
Open the Destination Addresses tab and add the mailbox you want everything forwarded to.
Cloudflare emails that address a verification link. Click it. Until you do, every rule pointing at that address stays switched off, and Cloudflare does this deliberately so nobody can quietly redirect mail into an inbox they don’t control.
If the verification email doesn’t turn up, check spam before you check anything else. It arrives from a Cloudflare address most inboxes have never seen before.
A useful detail here: destination addresses are shared across your whole Cloudflare account. Verify your Gmail once and every domain in that account can forward to it.
Creating Your First Address
Go to Routing Rules and create a custom address.
Type the part before the @, so admin, hello, contact, or whatever you want. Pick Send to an email as the action, choose your verified destination, and save.
That’s it. Send yourself a test message from a different account and it should arrive within seconds. If DNS propagation is still catching up it can take a few minutes, but this isn’t a wait-72-hours situation.
Two things worth knowing about rules. Each one maps a single pattern to a single destination, so forwarding one address to two people isn’t possible from the dashboard. That needs a Worker. And if you accidentally create two rules for the same address, only the first in the list does anything. The second sits there looking active and quietly does nothing.
There’s also a Drop action, which is more useful than it looks. It makes an address accept mail and then bin it. Handy when you want a form on your site to have a valid-looking address without anything reaching you.
Thinking Twice About Catch-All
The catch-all switch forwards anything@yourdomain.com to your inbox, including addresses you never created.
Every guide recommends turning it on. I’d leave it off, at least at first.
Spammers guess addresses in bulk: info@, sales@, admin@, then a dictionary. With catch-all on, every one of those guesses lands in your personal Gmail, and there’s no filtering layer between them and you. With it off, mail to an address you never made is simply refused, which is both quieter and a small privacy win.
Turn it on later if you find yourself creating a new alias every week. Not before.
Sending From Your New Address
Here’s the half the other guides skip.
Right now, mail to hello@yourdomain.com reaches your Gmail. Hit reply and it goes out from yourname@gmail.com. Whoever emailed you now has your personal address, and the whole point of the exercise has quietly failed.
Fixing this means giving Gmail an SMTP server to send through, because Cloudflare doesn’t provide one for this. You have three realistic options.
Option one: Gmail’s own SMTP
Free, and it works, with one strict condition: it has to be the SAME Gmail account that receives the forwarded mail. Set up an App Password on account A and try to send from account B and Gmail rewrites the From header back to your Gmail address. You’ll think it worked. It didn’t.
You’ll need 2-Step Verification enabled, then generate an App Password at your Google Account security settings. In Gmail, go to Settings » Accounts and Import » Send mail as » Add another email address and enter:
| Field | Value |
|---|---|
| SMTP Server | smtp.gmail.com |
| Port | 587 |
| Username | Your full Gmail address |
| Password | The 16-character App Password |
| Security | TLS |
Leave “Treat as an alias” ticked. Gmail sends a confirmation code to your new address, which Cloudflare forwards straight back to the same inbox. Paste it in and you’re done.
The catch: some recipients will see a small “via gmail.com” note next to your name, because Google’s servers are sending on behalf of a domain whose DNS doesn’t fully authorise them. It’s cosmetic and most people never notice it. It also means Gmail’s daily sending limits apply, which for a blog contact address is irrelevant.
Option two: a dedicated sending service
Resend, Brevo, SMTP2GO and similar services give you real SMTP credentials tied to your own domain, plus DKIM records you add to Cloudflare. Free tiers exist and are generous enough for personal use.
This is the version that produces a clean send with no “via” note, proper SPF and DKIM alignment, and mail that survives strict spam filters. It’s also another account to manage and more DNS records to keep straight.
Option three: Cloudflare’s own sending
Cloudflare now offers Email Sending as part of the same product. It’s in beta, it’s aimed at transactional mail from applications rather than at humans typing replies, and it sits on the Workers Paid plan.
One quirk worth knowing if you go looking: sending to addresses you’ve already verified as forwarding destinations is free on any plan, even with nothing but Email Routing configured. Useful for a contact form that only ever emails you. Not a route to a general-purpose mailbox.
The Limits Nobody Lists
Several articles about this describe Email Routing as unlimited. It isn’t, and Cloudflare publishes the numbers.
| Limit | Value |
|---|---|
| Routing rules per domain | 200 |
| Destination addresses per account | 200 |
| Inbound message size | 25 MiB |
| Domains per zone | 30 |
Nothing there constrains a normal person. But “unlimited” is wrong, and an attachment over 25 MiB gets rejected rather than truncated.
Three behaviours are worth knowing too. Unicode is allowed in the domain but not in the part before the @. Bounce reports aren’t passed back to whoever emailed you, so if forwarding fails they may never learn it failed. And a strict DMARC policy on the sender’s domain can cause forwarded mail to be rejected outright, which is a known consequence of how forwarding works rather than a Cloudflare bug.
When Mail Doesn’t Arrive
The usual causes, in the order worth checking.
The destination isn’t verified. This is the most common one by a distance. An unverified destination leaves every rule pointing at it silently disabled. The dashboard shows the address as pending, so look for that before anything else.
Old MX records are still there. If you had email on your domain before, a leftover MX record can win. Open your DNS tab and confirm the only MX entries are the three Cloudflare added.
Two rules for the same address. Only the first one runs. Delete the duplicate rather than editing it.
It’s in spam. Forwarded mail arrives at Gmail from Cloudflare’s servers rather than the original sender’s, and Gmail is occasionally suspicious of that. Cloudflare rewrites the envelope sender so SPF still passes at the far end, but the first few messages can land in spam anyway. Mark one as not spam and the problem generally stops.
Everything looks fine and nothing arrives. Check the Email Routing overview page. It logs what Cloudflare received and what it did with each message. If a message isn’t listed there, it never reached Cloudflare and the problem is DNS. If it is listed and shows as forwarded, the problem is at the destination end.
That last distinction saves more time than any other troubleshooting step, and it’s the one nobody mentions.
Is It Worth It
For receiving, yes, unreservedly. Ten minutes of work, no cost, and you stop handing out a personal Gmail address on your contact page. If you run several domains it’s better still, since one Gmail can collect from all of them.
For sending, be honest with yourself about what you need. The Gmail SMTP route is free and good enough for a blog. If you’re running an actual business where a “via gmail.com” note or a message in someone’s spam folder costs you a customer, pay for proper mail hosting and stop improvising.
What this setup buys you isn’t a mailbox. It’s an address you control, pointed at a mailbox you already had, which for most people writing a blog is the entire requirement.