
You finished your website. You hit publish. Then you searched for it on Google, and got nothing. A few days later, still nothing. It feels like the whole internet is ignoring you.
Here is the part nobody tells beginners: Google has no idea your site exists yet. It will find you eventually, but “eventually” can mean weeks. The faster way is to introduce yourself, and the tool built for that introduction is Google Search Console.
This guide walks you through how to add your website to Google Search Console from start to finish. You will set up your property, prove you own the site, submit your sitemap, and push your first pages into Google’s index. No jargon, no skipped steps.
What Google Search Console Actually Does (And What It Doesn’t)
Before you touch a single button, it helps to know what you are signing up for. A lot of beginners expect the wrong thing, get confused, and give up.
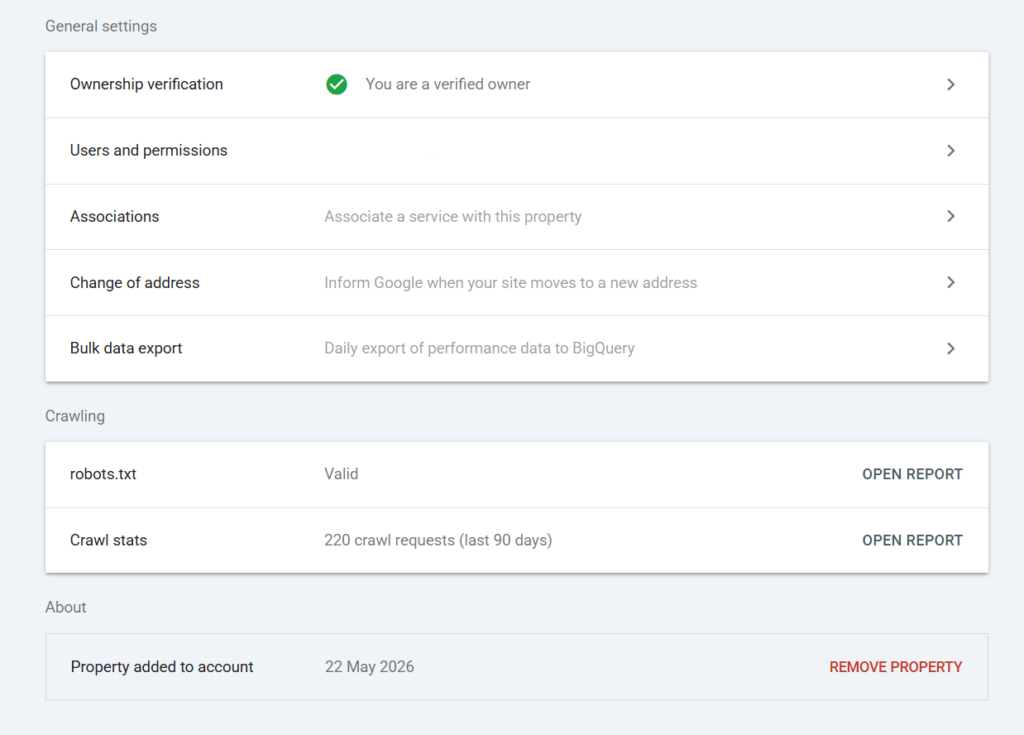
Google Search Console is a free dashboard from Google. It shows you how your site behaves in search: which queries bring people to you, how many impressions and clicks each page gets, your average position in the results, and which URLs Google has crawled and indexed. If a page has an indexing error or your sitemap is broken, this is where Google tells you.
Now the part that saves you from disappointment. Adding your site here does not boost your rankings. Not even a little. It is a window, not an engine. It lets you see what is happening so you can fix problems and make better decisions, but the climbing still comes from good content and solid SEO.
So think of it this way. Search Console is your site’s health monitor. It will not make you healthier on its own, but you would be foolish to run without it.
What You Need Before You Begin
The setup itself is quick. The waiting around it is what takes time. Get these three things ready first and the whole process goes smoothly.
- A Google account. The same one you use for Gmail works fine. If you plan to use Google Analytics too, use that account so the two tools talk to each other later.
- A live website with a real domain. It can be on WordPress, Blogger, Shopify, or anything else, as long as it is online and reachable.
- Access to verify ownership. This means you can either log into your domain’s DNS settings, or edit your site’s theme, or you already have Google Analytics installed. Any one of these is enough.
That last point trips people up the most, so keep it in mind. Verification is just Google asking you to prove the site is really yours. The method you can access decides the path you take in a minute.
Domain Property or URL Prefix: Which One to Pick
When you add a new property, Google asks you to choose between two types. This screen confuses almost everyone, and most guides rush past it. Let’s slow down, because picking the right one now saves you real headaches later.
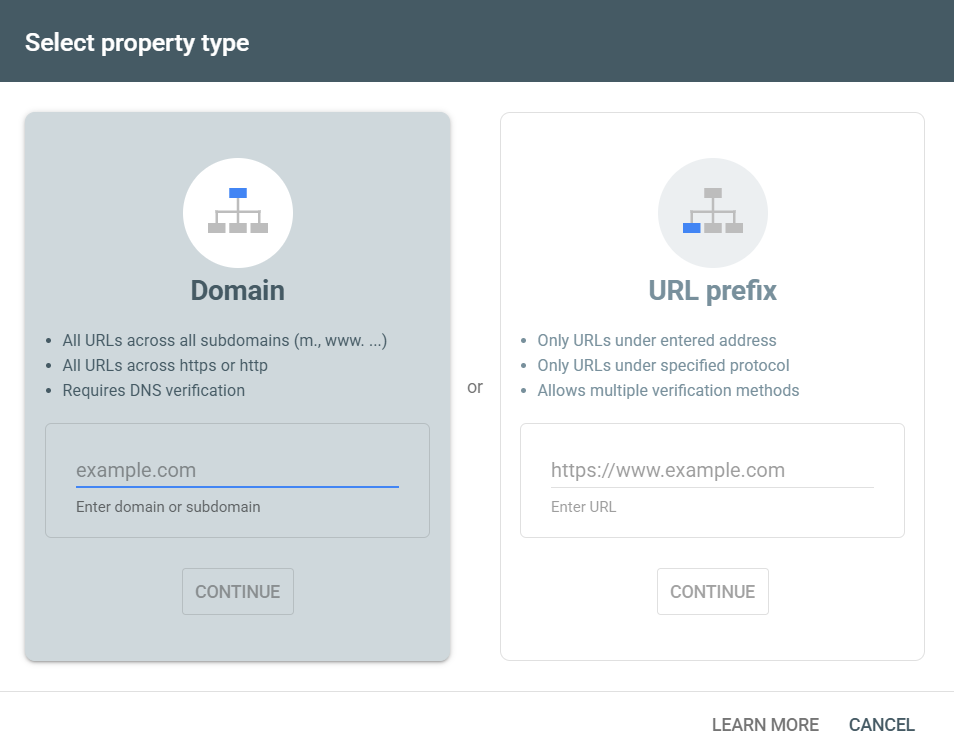
A Domain property covers your entire domain at once. Every version of your site is included: with www and without, http and https, and any subdomains. You verify it once through a DNS record, and you never have to think about which version of your URL Google is tracking. The catch is that it can only be verified through DNS, so you need access to your domain settings.
A URL prefix property covers only the exact address you type in. If you enter https://yoursite.com, then http://yoursite.com and https://www.yoursite.com are treated as separate sites. The upside is flexibility. You can verify it several ways, including a simple HTML tag, which is perfect if you cannot reach your DNS.
So which should you choose? At Mamang Digital, we lean toward the Domain property whenever you can manage your DNS, simply because it gives you the full picture with zero gaps and you only set it up once. If DNS feels out of reach, or you just want the fastest route to seeing data, the URL prefix with an HTML tag is completely fine. You can always add the other type later.
Adding Your Website to Google Search Console and Verifying Ownership
This is the heart of the process. Head to the Search Console website and sign in with your Google account. If this is your first time, you will land on a welcome screen asking you to add a property. If you have used it before, click the property selector in the top left and choose “Add property”.
Now pick your property type from the section above and enter your address. From here, the path splits depending on how you want to prove ownership.
If you chose Domain, Google hands you a TXT record. Copy it, open your domain registrar or DNS provider, and add it as a new TXT record on your domain. Save it, wait a few minutes, then come back and click Verify.
If you chose URL prefix, the easiest method is the HTML tag. Google gives you a small meta tag. Paste it inside the <head> section of your homepage, before the closing </head> tag, then click Verify. On WordPress, an SEO plugin like Yoast has a dedicated field for this exact code, so you never have to touch theme files. On Blogger, you drop it into the theme’s HTML.
Prefer not to edit any code at all? There is an even simpler option for URL prefix: the HTML file upload. Google gives you a small verification file to download, and you upload it to your site’s root folder through your hosting file manager or FTP. Once it sits at yoursite.com/google-xxxx.html and opens in a browser, click Verify. This one is handy if you have hosting access but feel nervous about touching theme code.
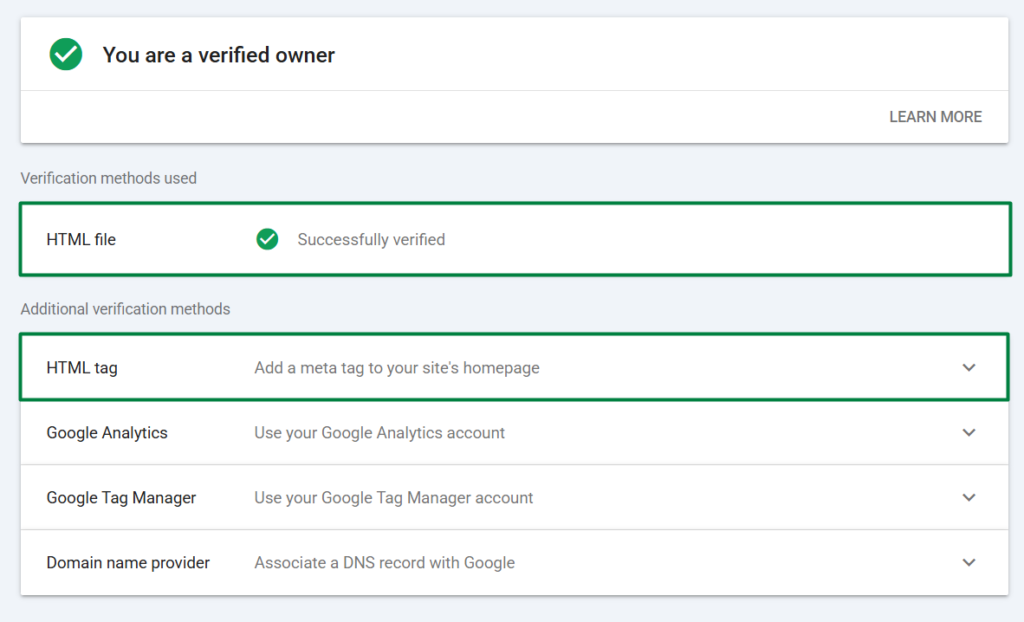
Two other methods exist if those do not suit you. You can verify through an existing Google Analytics tag, or through Google Tag Manager. Both work instantly if the code already sits in your homepage head.
One small but useful detail. If you get stuck halfway, click “Verify later”. Google saves your progress, and you can finish the moment you sort out access. There is no need to start over.
Submitting Your Sitemap So Google Sees Every Page
Verifying your site tells Google you exist. Submitting your sitemap tells Google what to look at. Skip this and you are leaving Googlebot to wander your site blind, hoping it stumbles onto your pages through links.
A sitemap is just an XML file listing every page and post you want indexed. The good news is you almost certainly already have one. You just need to find its address.
- On WordPress with Yoast, your sitemap usually lives at
yoursite.com/sitemap_index.xml. - On Blogger, it sits at
yoursite.com/sitemap.xml. - On most other platforms, try
yoursite.com/sitemap.xmlfirst.
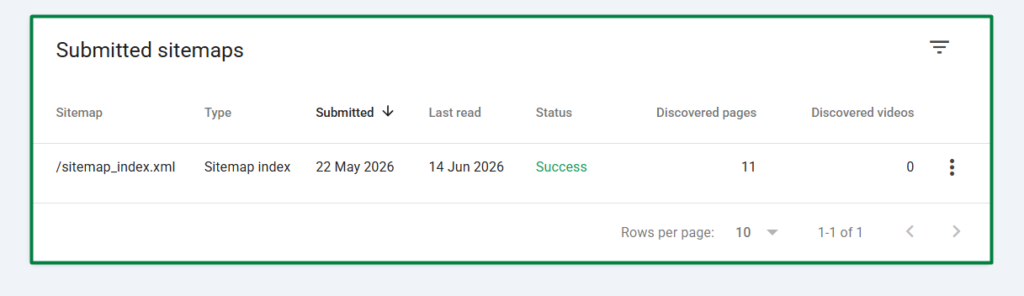
Open that address in your browser to confirm it loads and shows a list of URLs. Once you know it works, go to the Sitemaps report inside Search Console, type the sitemap path into the box, and click Submit.
Here is something worth knowing ahead of time. The first time you submit, the status sometimes reads “Couldn’t fetch” even when nothing is wrong. More often than not, this clears on its own within a day once Google actually gets around to reading the file. So submit it, then give it time before you start troubleshooting.
Asking Google to Index a Specific Page Faster
Submitting a sitemap is the slow, steady way to get indexed. But when you publish something new and want it seen quickly, there is a faster nudge: the URL Inspection tool at the top of Search Console.
Paste the full address of your new page into the search bar at the top of the dashboard. Google checks whether the page is already in its index. If it is not, you will see a “Request Indexing” button. Click it, and your page joins Google’s crawl queue.
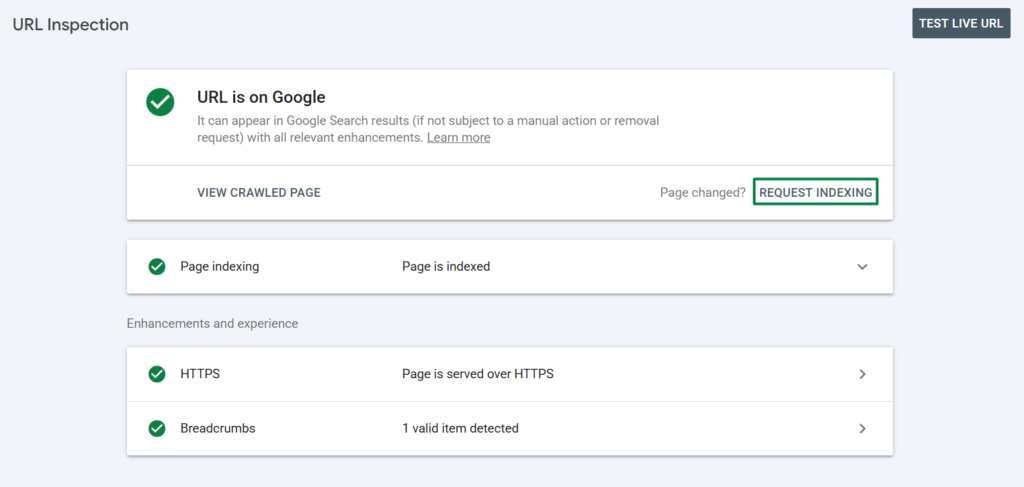
This does not guarantee instant ranking, and it will not force a page in if Google decides it is low quality. What it does is move you to the front of the line for a fresh crawl, which usually means indexing within hours to a couple of days instead of weeks. Use it for important new posts, not for every tiny edit.
Why Your Dashboard Is Empty (And Why That’s Normal)
You did everything right. You verified the site, submitted the sitemap, requested indexing. You open the dashboard the next morning expecting charts, and you see a flat, empty graph. This is the moment most beginners assume they broke something.
You did not break anything. Search Console only starts collecting data after verification, and it needs a few days before meaningful numbers appear. On a brand new site with little traffic, it can take even longer, because there simply are not many impressions or clicks to report yet.
So treat the first week as a quiet period. Check back in a few days, not a few hours. The data will trickle in, then build. Refreshing the page every twenty minutes will not make Google move faster, it will only make you anxious.
When Verification or Your Sitemap Fails
Most setups go fine. But when something snags, it is almost always one of a handful of usual suspects. Here is how to read the most common errors.

- Verification failed after adding a DNS record: DNS changes are not instant. They can take anywhere from a few minutes to 24 or 48 hours to spread. Wait, then click Verify again before assuming you did it wrong.
- “Couldn’t fetch” on your sitemap: First, open the sitemap address in your browser. If it does not load, the problem is the URL itself, not Google. Double-check you used
httpsand the exact path with no typos. - “Sitemap could not be read”: This often points to your
robots.txtfile accidentally blocking access, or a “discourage search engines” setting still switched on. Check both. - Verified but the wrong version is tracked: If you used a URL prefix and your data looks thin, you may have verified
httpwhile your site runs onhttps, or the www version instead of non-www. This is exactly the gap a Domain property avoids.
The thread running through nearly all of these is patience. A surprising number of “errors” are just Google needing time to catch up. Give it a day before you tear your setup apart.
What to Do Once the Data Starts Coming In
Setting up Search Console is the easy part. The real value is learning to read what it tells you, and that is a habit you build over weeks, not minutes.
Start with two reports. The Performance report shows the actual search queries bringing people to you, which is gold for understanding what your audience really wants. The Pages report (sometimes called Coverage) shows which URLs are indexed and which are not, so you can spot pages that slipped through the cracks.
Get into the rhythm of submitting your sitemap once at setup, requesting indexing whenever you publish something important, and checking these reports every week or two. That simple routine is what separates site owners who guess from site owners who know.
Add your website to Google Search Console today, even if your site is brand new and quiet. The sooner you start gathering data, the sooner you can act on it. At Mamang Digital, this is the very first thing we set up on any new site, before chasing a single visitor.
Frequently Asked Questions
Is Google Search Console free?
Yes, completely. There are no paid tiers and no hidden upgrades. Every feature, from the Performance report to URL inspection, is free for any verified site owner.
How long until I see data after verifying?
Usually a few days. Search Console only begins collecting data from the moment you verify, and a new site with little traffic takes longer to show meaningful numbers. An empty graph in the first week is normal, not a sign of a mistake.
Do I need both a Domain and a URL prefix property?
No. A Domain property already covers every version of your site, so it is enough on its own. You only really want both if you have a specific reason to track one section separately.
Does adding my site to Search Console improve my rankings?
No. It is a measurement tool, not a ranking booster. It shows you what is happening and helps you fix problems, but the actual ranking still depends on your content and SEO. For the full official details, see Google’s Search Console help.